
Description
When customer would like to change the Ubuntu OS Language, please refer to the following steps:
Step 1
1.1 Click Network Connection

1.2. Edit
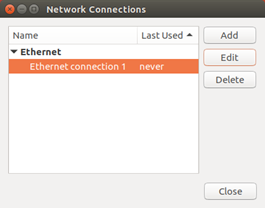
1.3. Set Current Connection with additional DNS servers (for example 8.8.8.8)
>> Save setting with administrator authentication (Password: admin)

Step 2: Update the Ubuntu database via following procedure.
Noted : This is MUST-DO step before changing languages
2.1. Right-click on the Desktop and select “Open Terminal”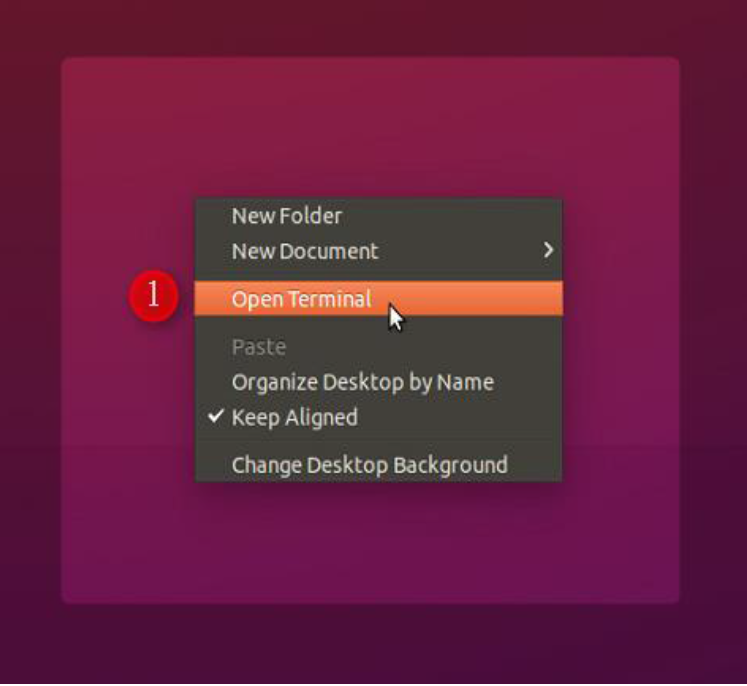
2.2. Input the user ID and password (su -/ admin)
2.3. Input gedit /etc/apt/sources.list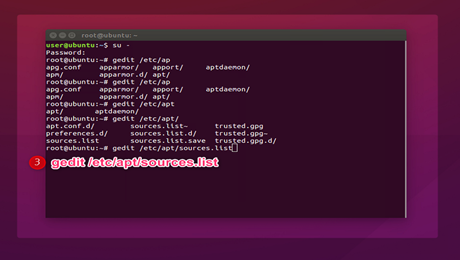
2.4. Delete the original content and modify to:
deb http://old-releases.ubuntu.com/ubuntu/ wily main restricted universe multiverse
deb http://old-releases.ubuntu.com/ubuntu/ wily-updates main restricted universe multiverse
deb http://old-releases.ubuntu.com/ubuntu/ wily-security main restricted universe multiverse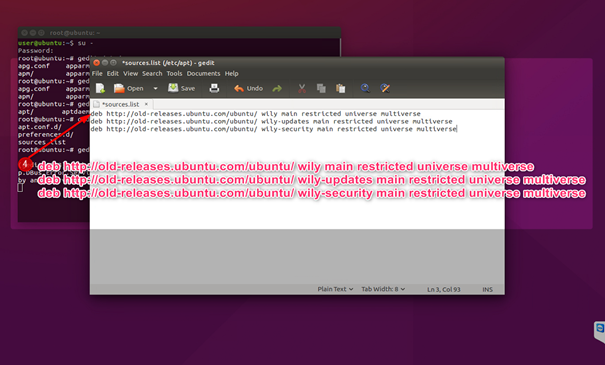
2.5. Click “Save” and then close the editor
2.6. Input apt update to synchronize the Ubuntu database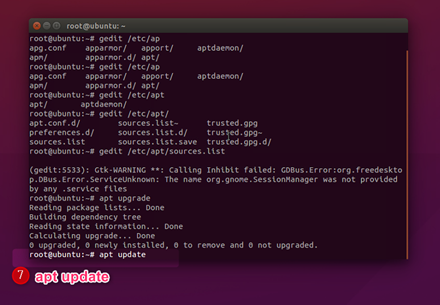
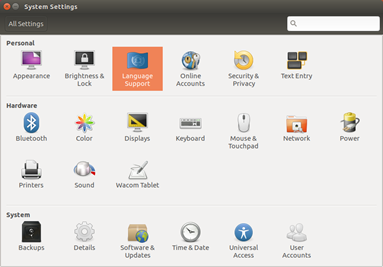
Step 3:
3.1. System Settings

3.2. Click Language Support
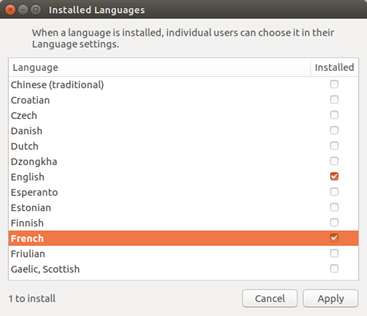
3.3. Install new language

3.4. Apply setting with user authentication (Password: user)
3.5. Drag installed language to the top of the list
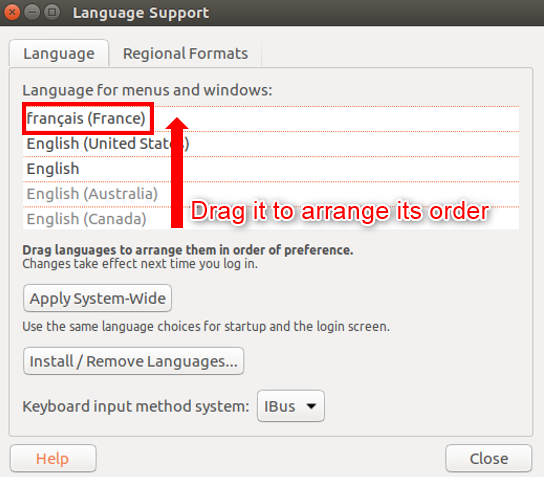
3.6. Logout to apply settings
--------------------------------------------------------------------------------------
Input Method Editor
After change the Ubuntu OS Language, please go to Input Method Editor to change input source.
Please refer to the following steps:
Step 4.
4.1. Input Method Editor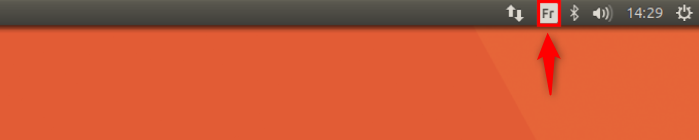
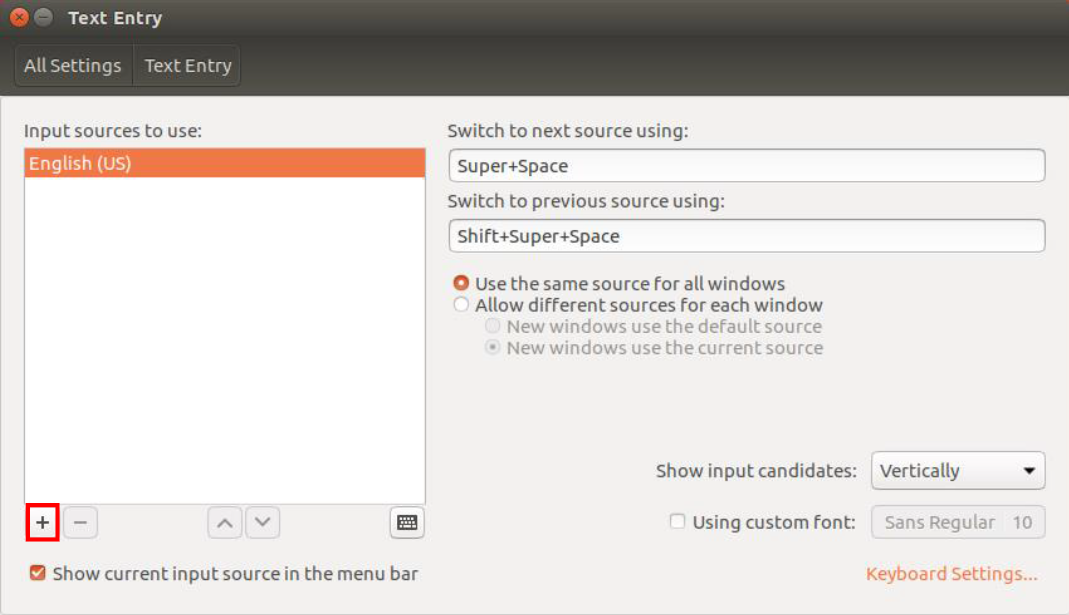
4.2. Text Entry Settings > Add new input source
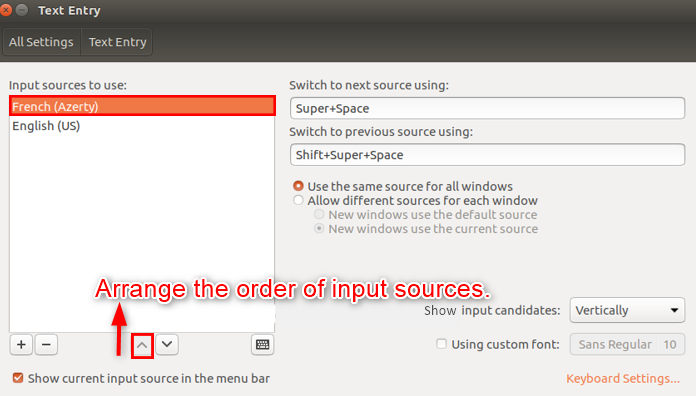
4.3. Adjust the order of the input sources
4.4. Logout to apply settings
4.5 Done
Comments
0 comments
Please sign in to leave a comment.